Patient Portal Instructions
Our internet-based Patient Portal effectively and securely manages your healthcare information. The content in this document will guide you through the secure portal’s most frequently-required functions.
Activate Your Patient Portal Account
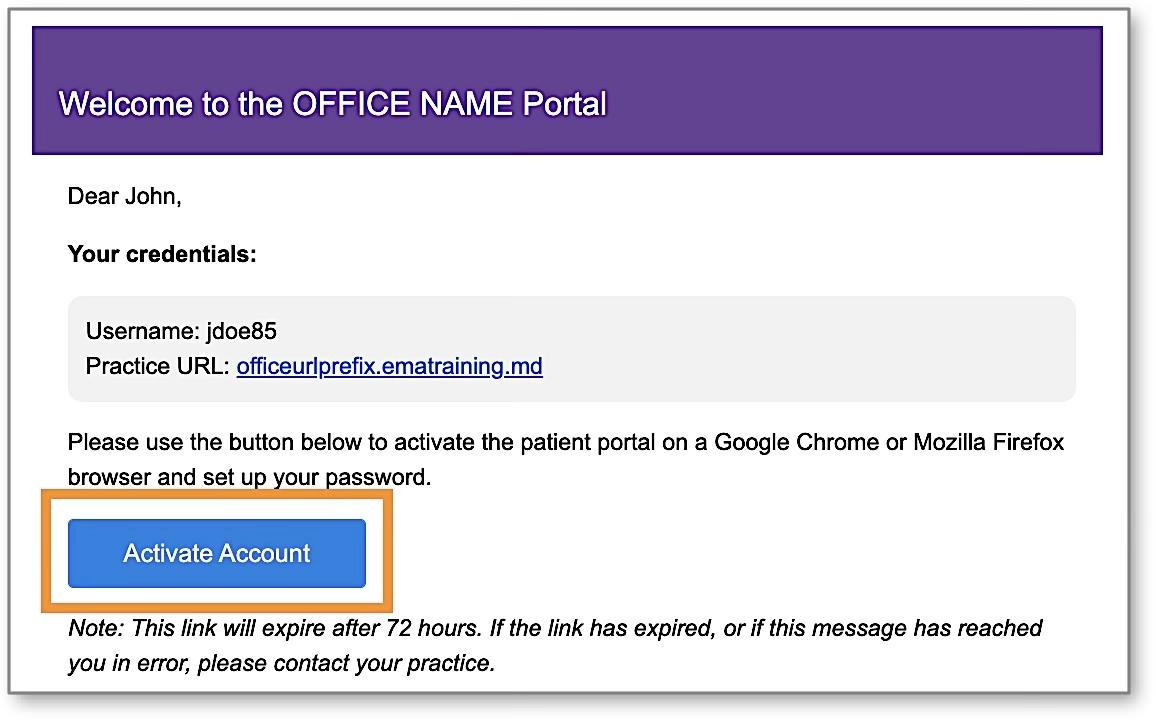
An account must be created before you can use the Patient Portal. Providing us with your email address allows us to send you an email from the Queen City Dermatology that includes a link to activate your Patient Portal account.
- Open our email with the subject, “Welcome to Your Queen City Dermatology Patient Portal”.
- The email will include your Patient Portal Username, Practice URL (patient portal web address) and the Steps for logging into the portal.
- Select: Activate Account.
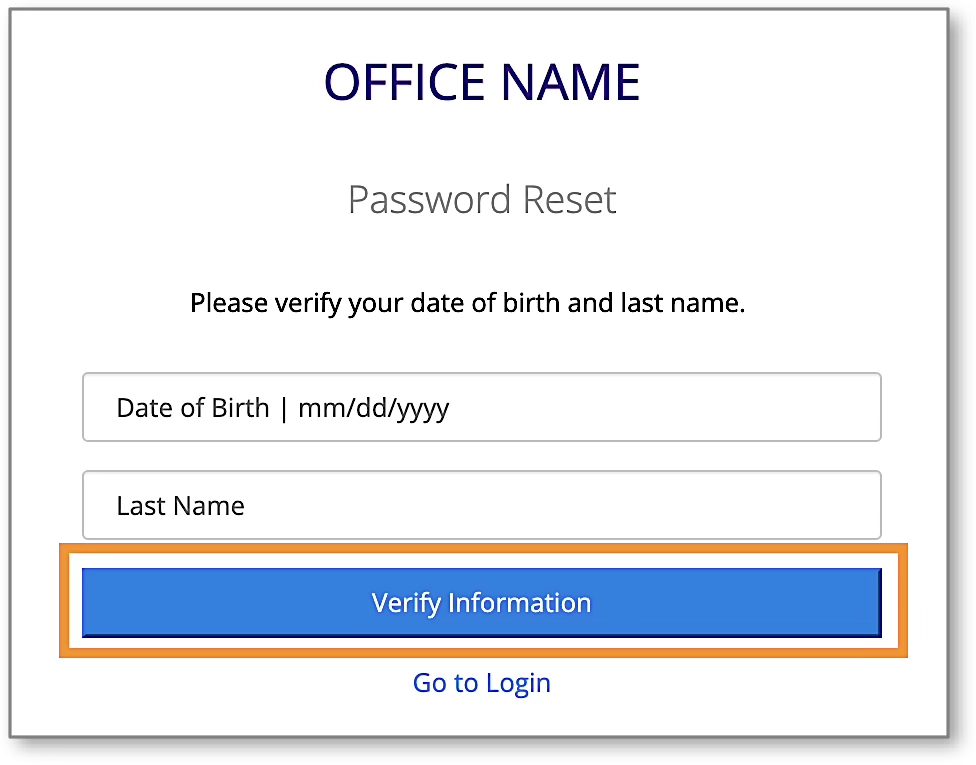
You will be directed to the portal website, where you will be prompted to verify your identity by entering your Date of Birth and Last Name. Then, select Verify Information.
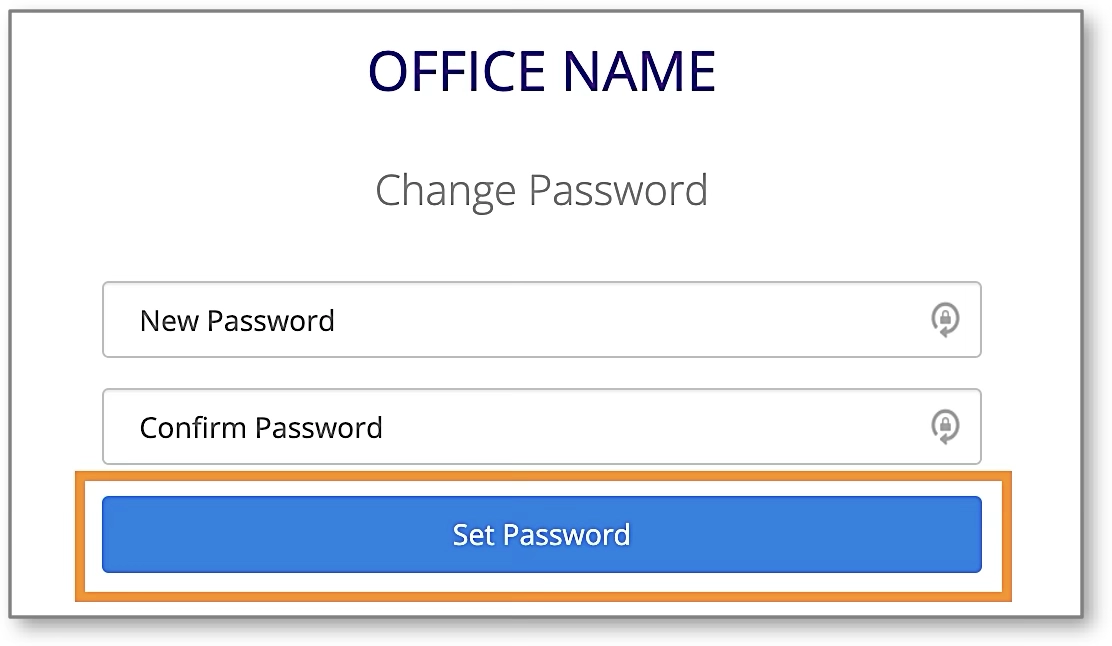
You will be prompted to change your password. Once entered, select Set Password.
Log in to the Patient Portal
Once your account is activated, you may log in to the Patient Portal as needed. Follow the steps below to log in.
- Open your internet browser on a computer or laptop and enter the following website URL into the address bar: qcd.ema.md

- Select Continue as Patient.
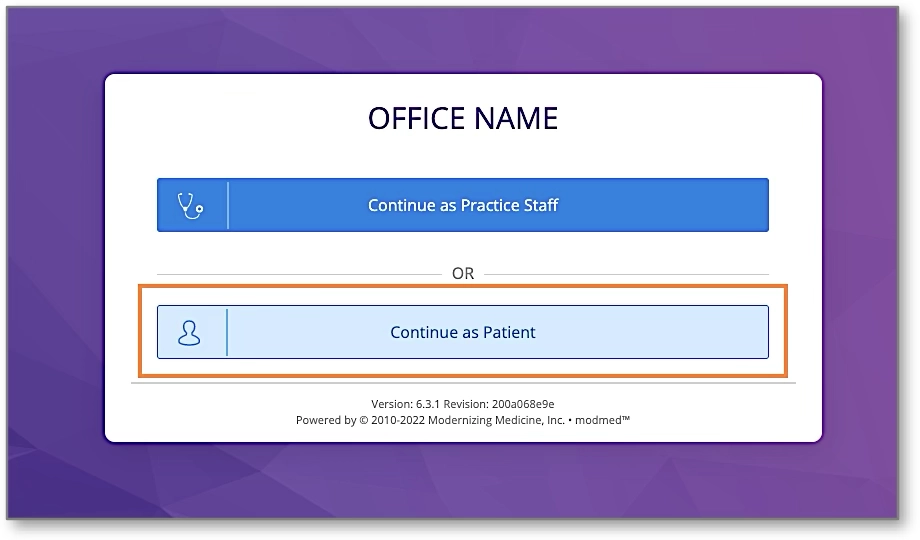
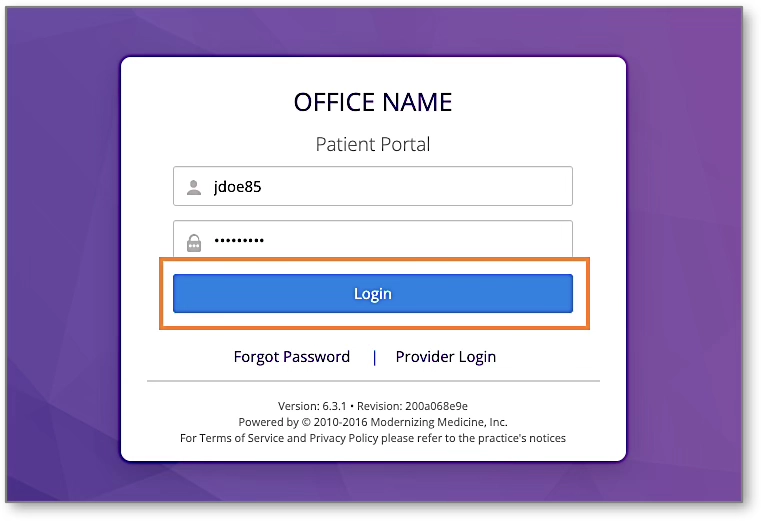
Enter your Patient Portal Username and Password, then select Login.
Forgot Password
Follow these instructions if you forgot your password and need to create a new one.
Note: These instructions will only work if your Patient Portal account is already created and the information entered is correct according to our records. If you have any trouble receiving your password reset link, please contact our office.
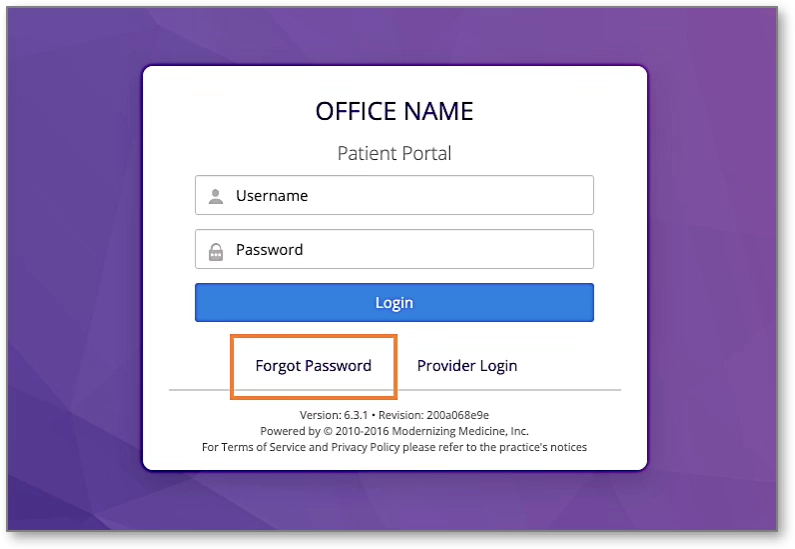
From the Patient Portal login screen, select Forgot Password.
Enter the requested information, then select Request Email.
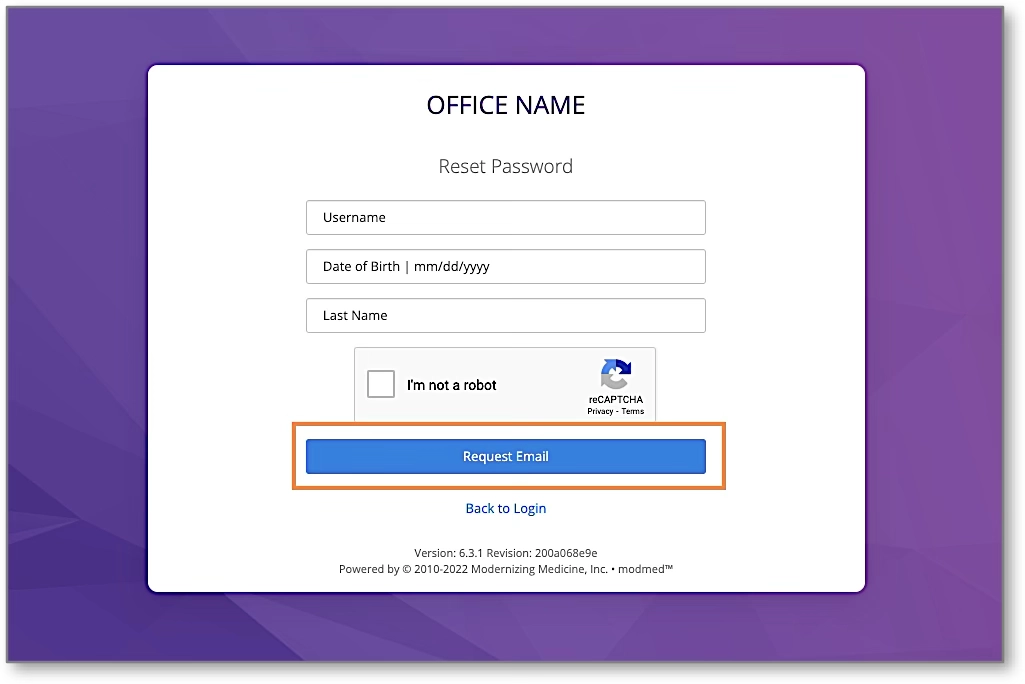
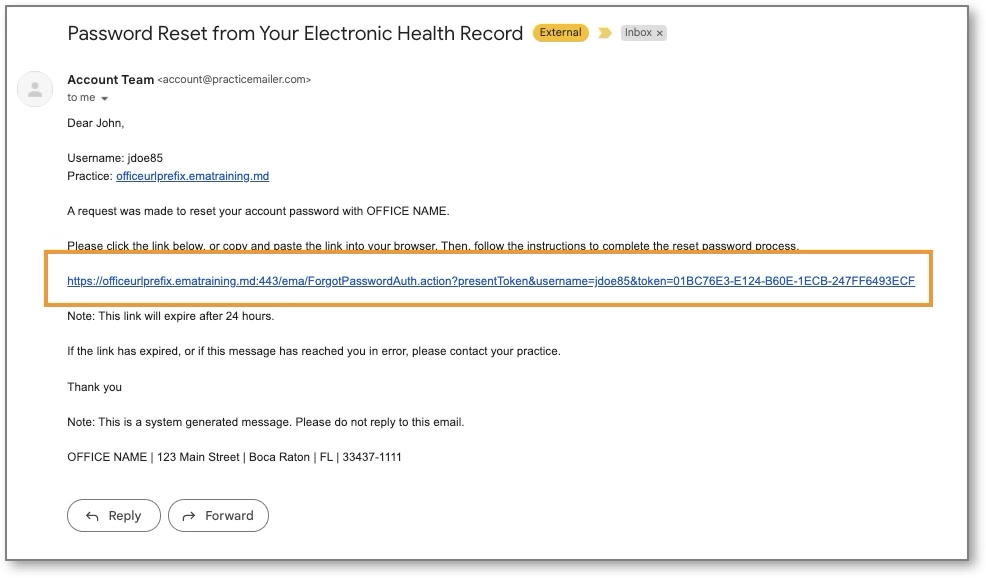
Open your email and look for the message with the subject “Password Reset from Your Electronic Health Record”. The email will include your Username and Practice information, as well as a link to reset your Password. Select the Link to continue.
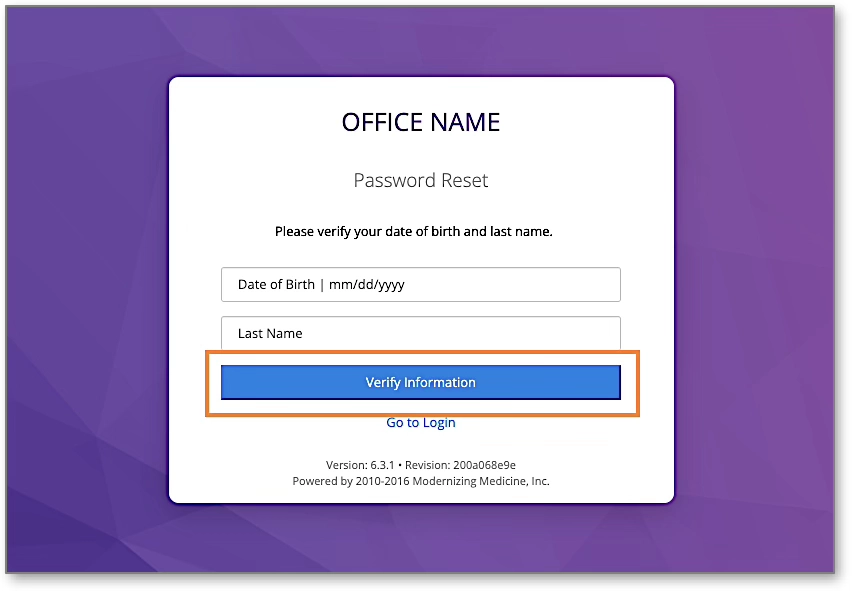
You will be prompted to enter your Date of Birth and Last Name to verify your identity. Once entered, select Verify Information.
Prepare for Your Visit
Once you have activated your account, you may use the Patient Portal to complete visit forms and view your health information.
Complete Forms on the Patient Portal
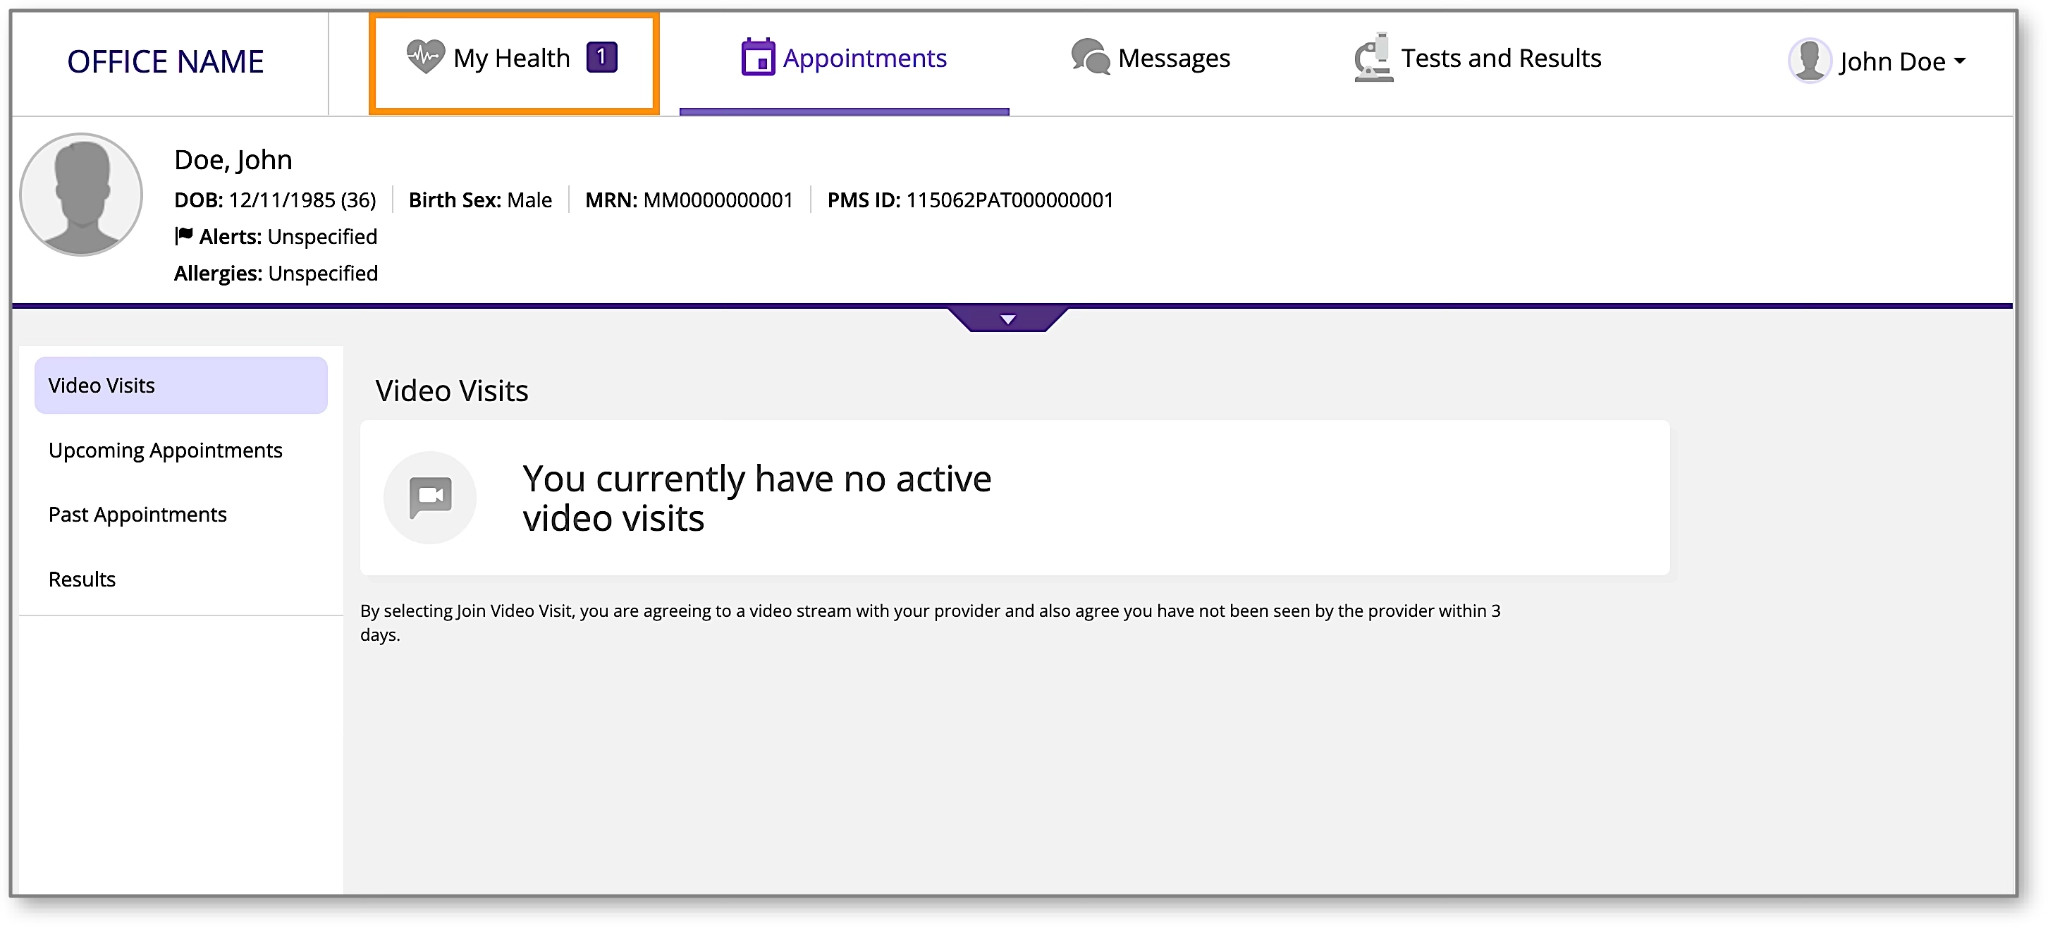
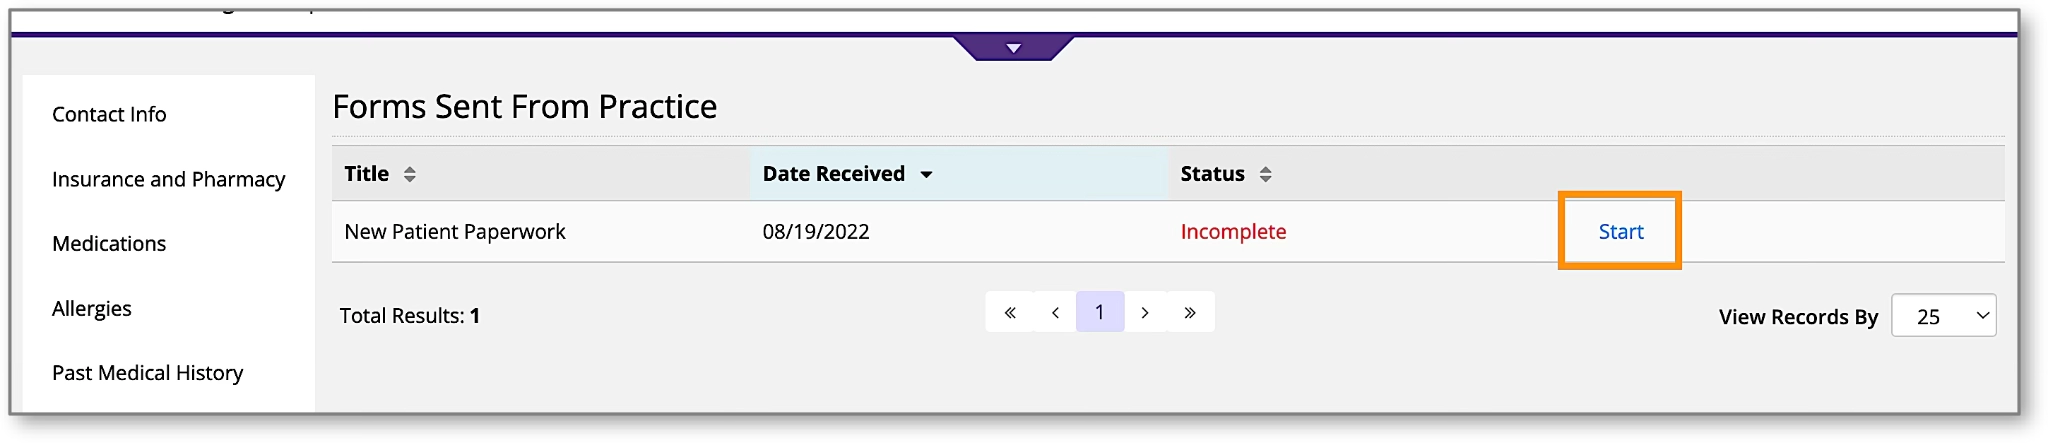
Once logged in, select My Health from the main navigation bar at the top.
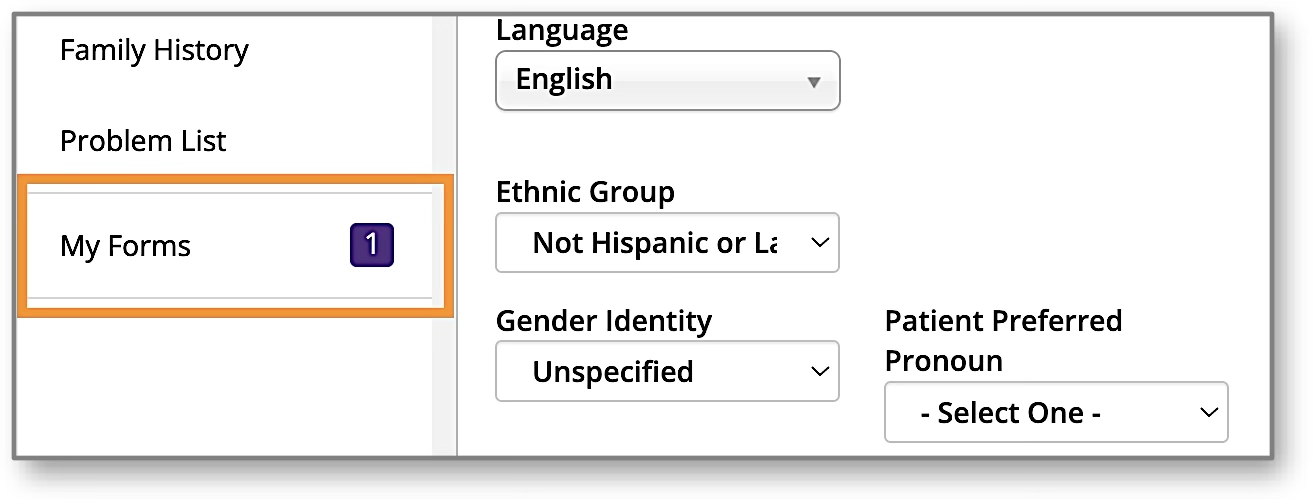
From the My Health page, select My Forms.
Any forms that have been assigned to you will be available to review and edit. Select Start to begin reviewing the forms and making applicable changes.
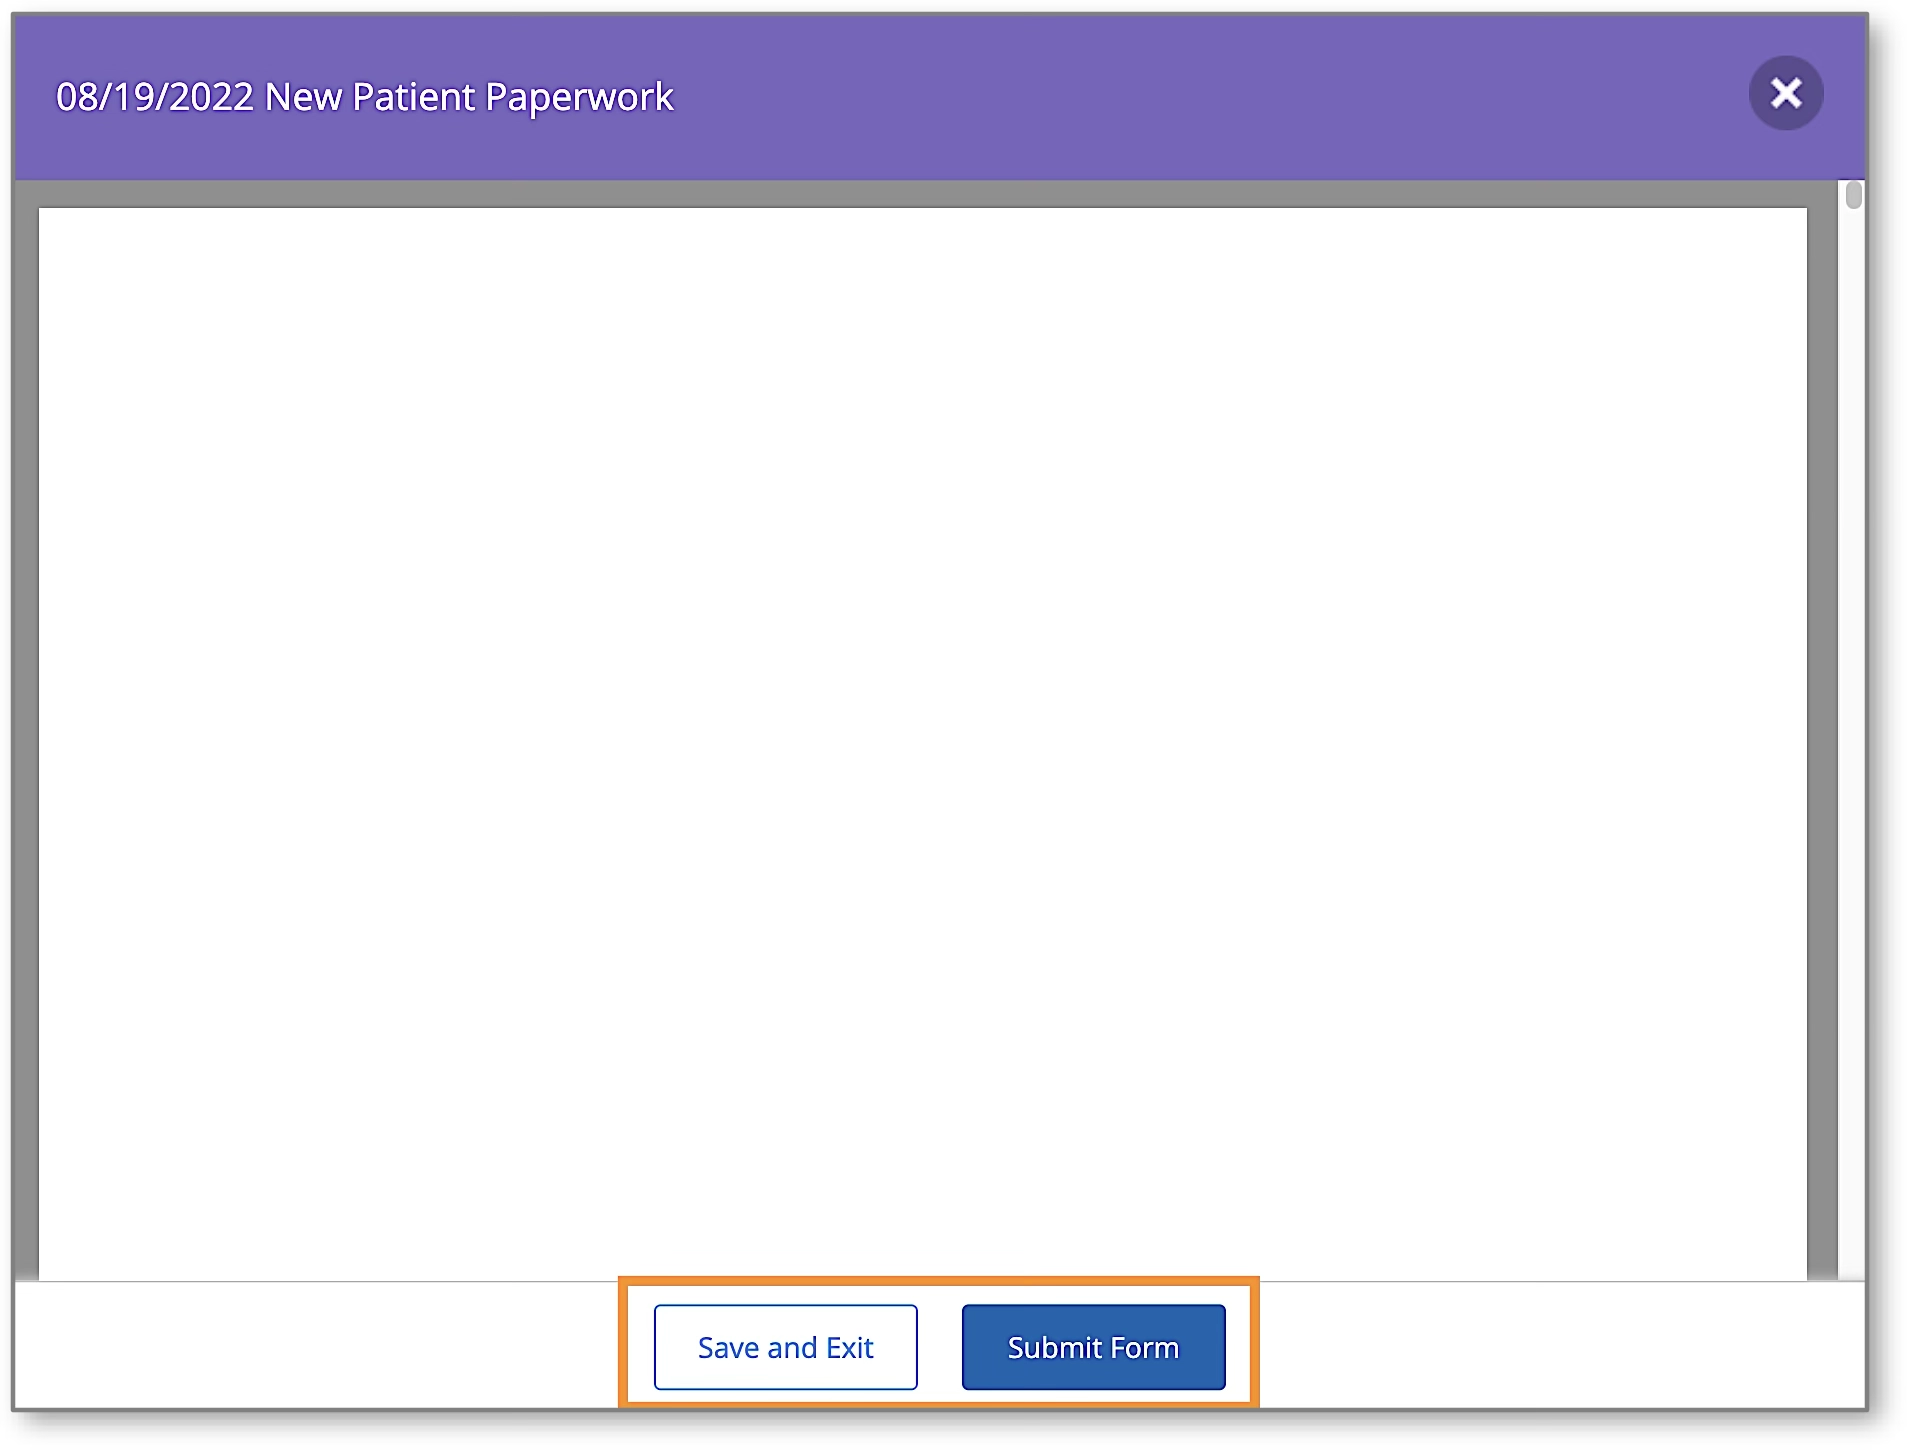
A pop-up window will appear with the specified form. You can place your cursor in the appropriate fields and enter the applicable information. You have the option to Save and Exit or Submit Form.
- Save and Exit = Marks the form “In Progress” and allows you to continue to edit.
- Submit Form = Closes the form and Submits it to the office.
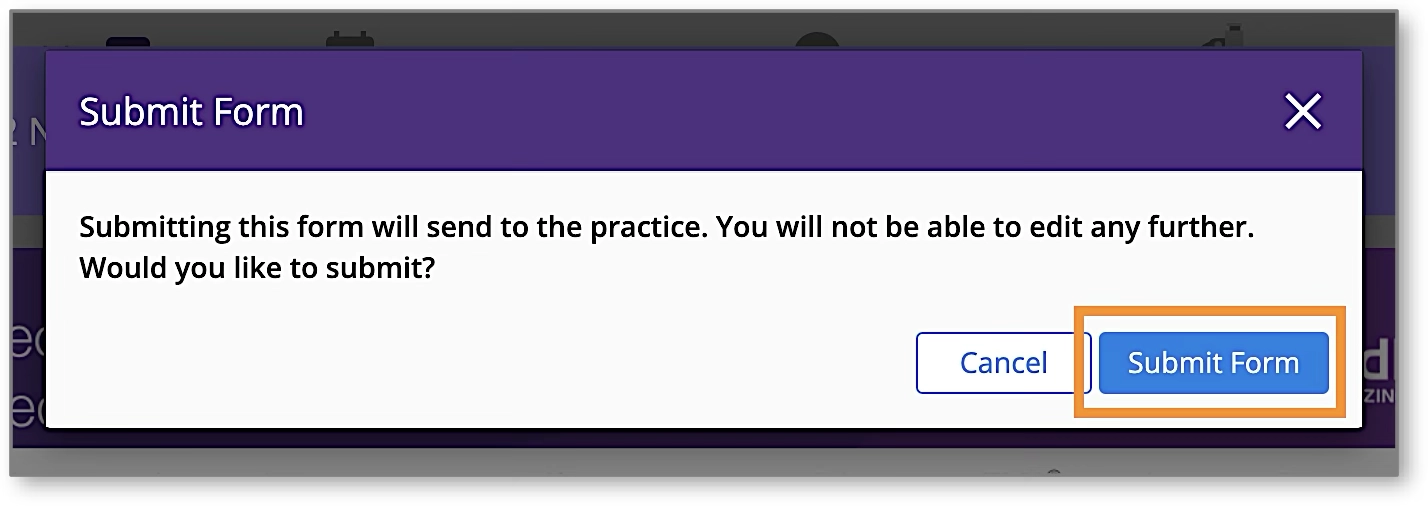
Once complete, select Submit Form. You will receive a pop-up alerting you that you are submitting the form to the office and you will not be able to edit any further. When ready, select Submit Form.
Add or Update Medical Information
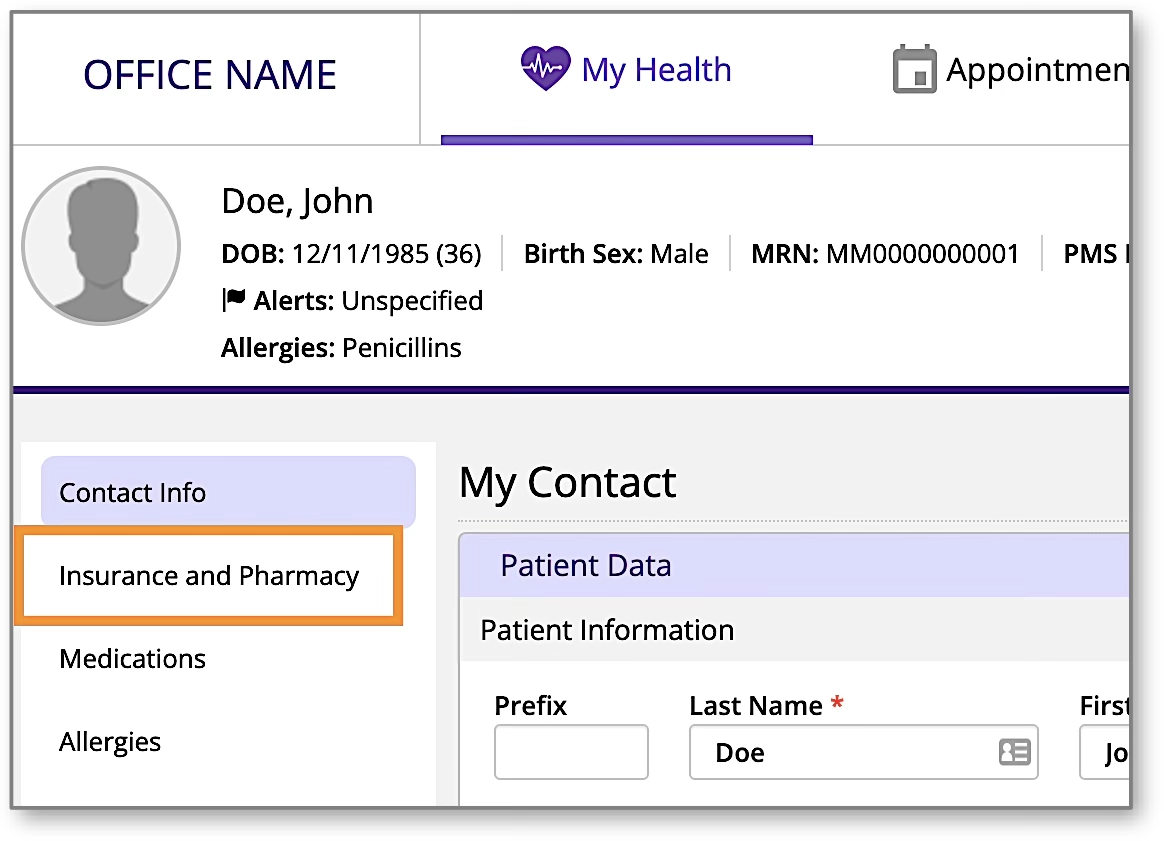
In this section, you will learn how you can verify your contact and insurance information, update your medical history, and add your preferred pharmacy. Once logged in to the Patient Portal, select My Health and navigate through the sections to enter and/or update your Medications, Allergies and Past Medical History.
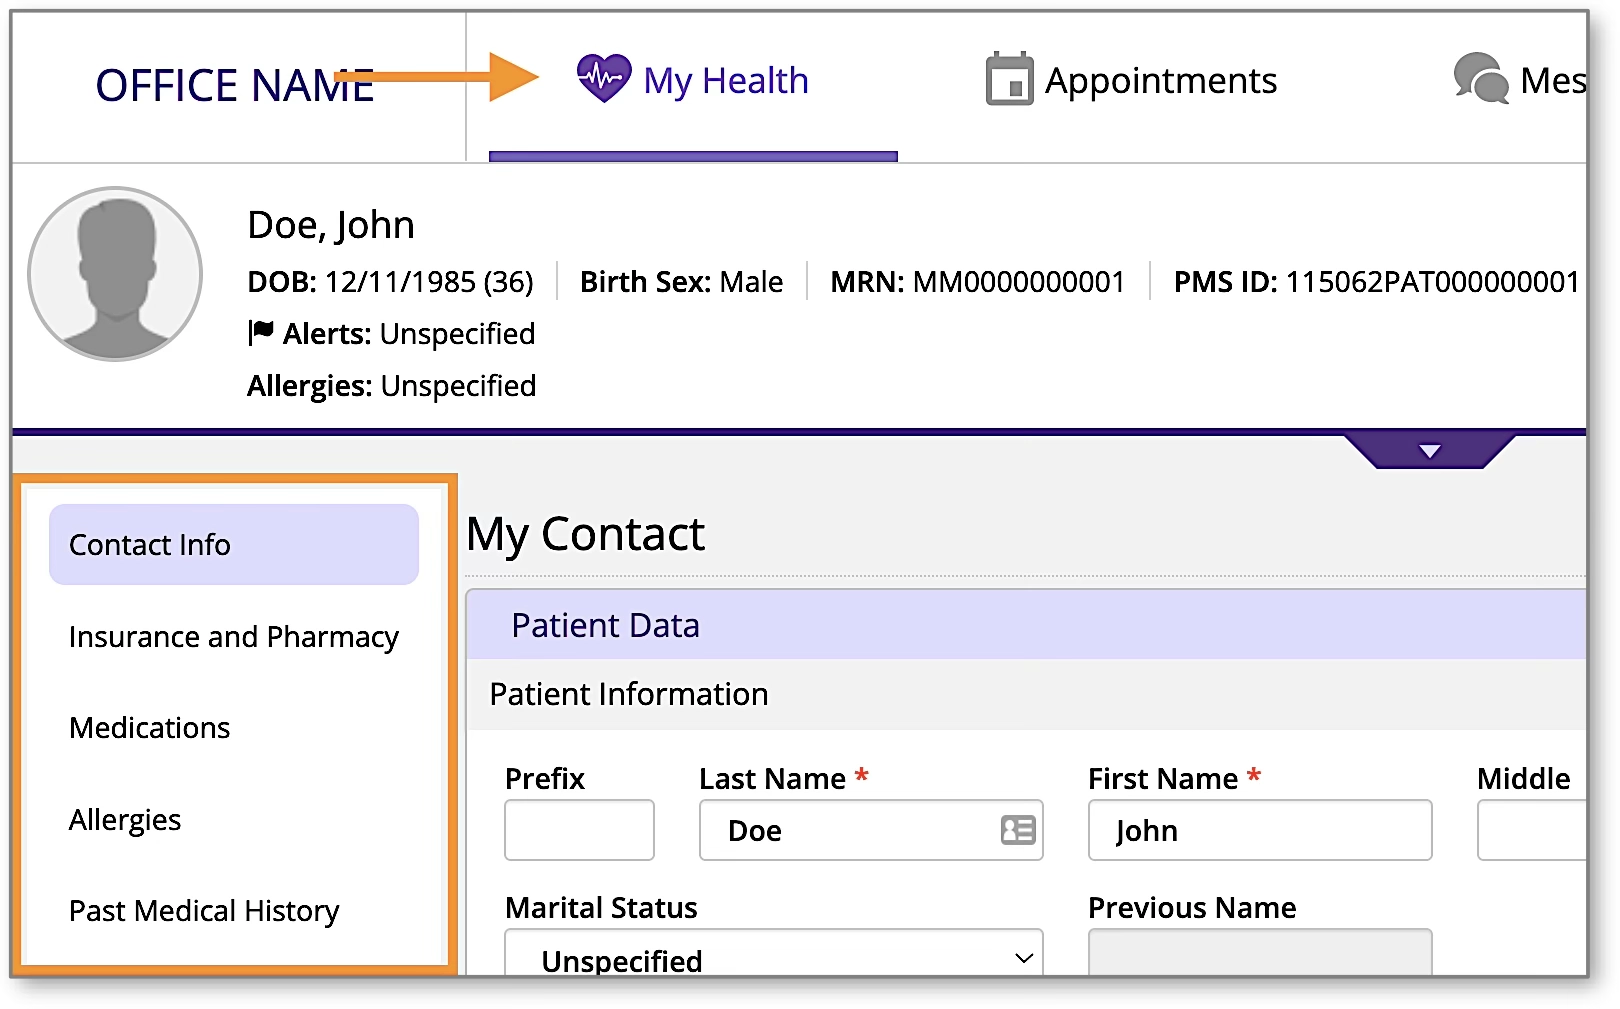
- Contact Info = View basic contact and demographic information.
- Insurance and Pharmacy = View insurance information and Add or Edit your Pharmacy. See below for additional instructions.
- Medications = Add or edit your medications list.
- Allergies = Add or edit your allergies.
- History = Add or update Past Medical History, Specialty-Specific History, Social History and Family History.
- Tests & Results = View any result that your medical provider has posted.
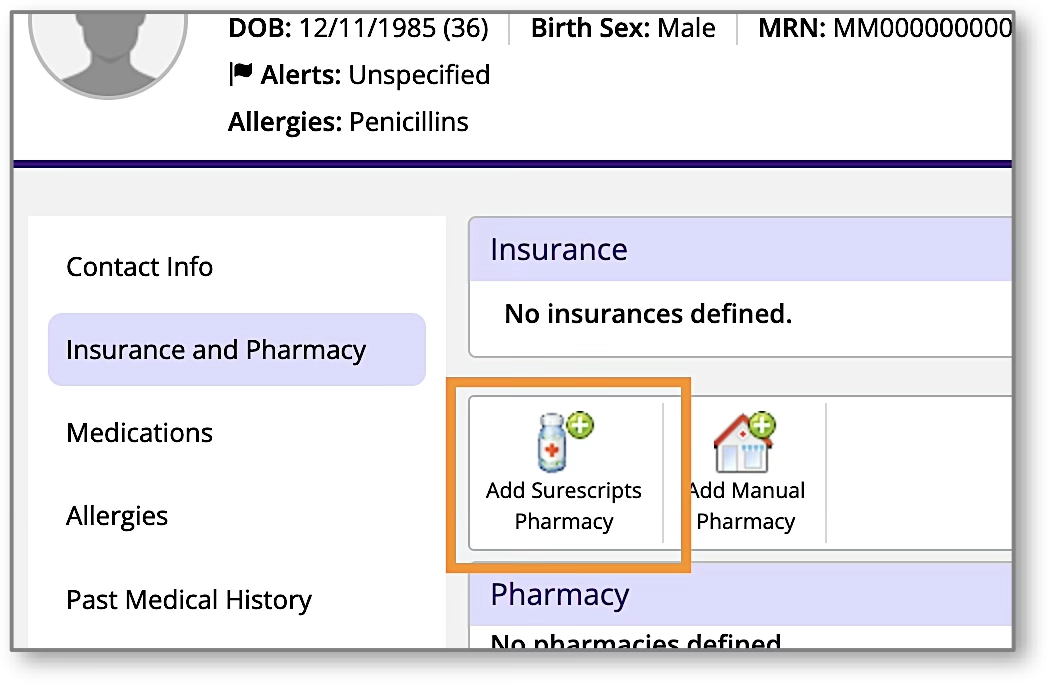
Add Your Preferred Pharmacy
In this section, you will learn how to add your preferred pharmacy to your patient chart. Adding your pharmacy will assist our office with sending electronic prescriptions and medication refills. From the My Health section of the portal, select Insurance and Pharmacy.
There are two options to enter your pharmacy information, Add Surescripts Pharmacy and Add Manual Pharmacy.
- Add Surescripts Pharmacy (try this option first) = Allows you to search for pharmacies that can send and receive electronic prescriptions.
- Add Manual Pharmacy = If you were not able to find your preferred pharmacy through the Surescripts option, you can use “Add Manual Pharmacy” to type in pharmacy information to your chart. It is recommended that you first attempt to add a Surescripts pharmacy before using this method.
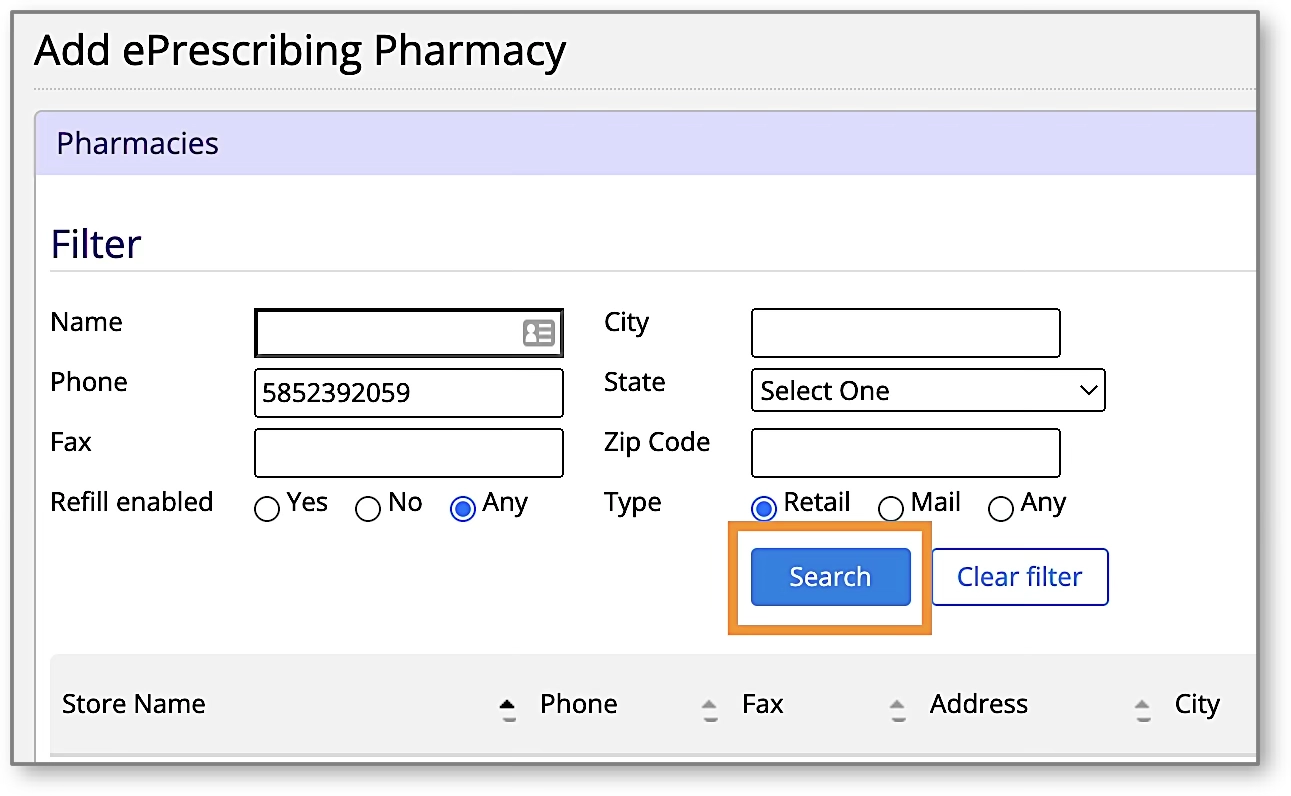
Select Add Surescripts Pharmacy.
Use the Filter options to find your preferred pharmacy. Then, select Search.
Tip: Not all fields are required. Use any combination of the criteria to locate your pharmacy. Common search methods include Phone number only, or Name and Zip Code.
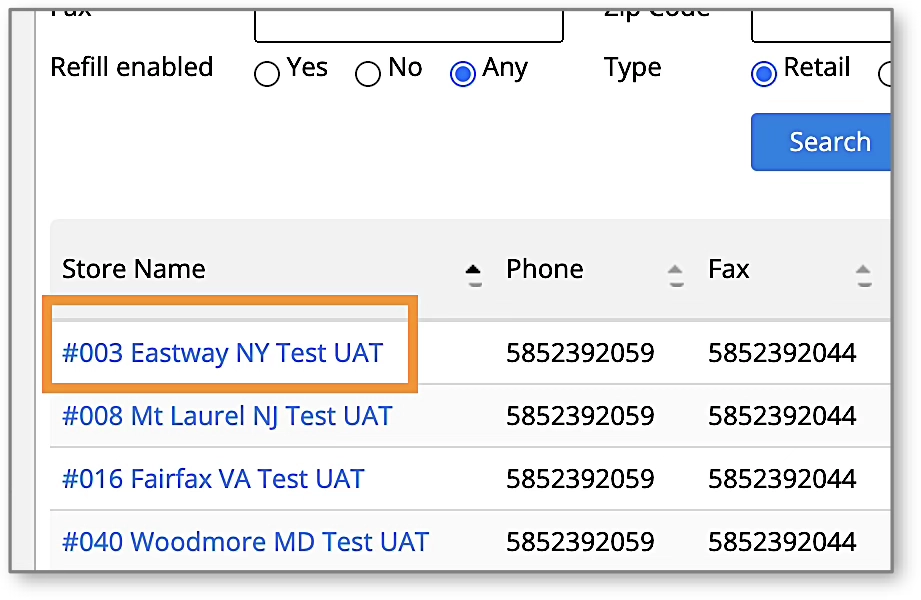
Locate the pharmacy in the list of results by verifying the name and address. Once found, select the Blue Pharmacy Name to add the pharmacy.
Access Your Medical Records
View, Download, and Print Your Visit Notes
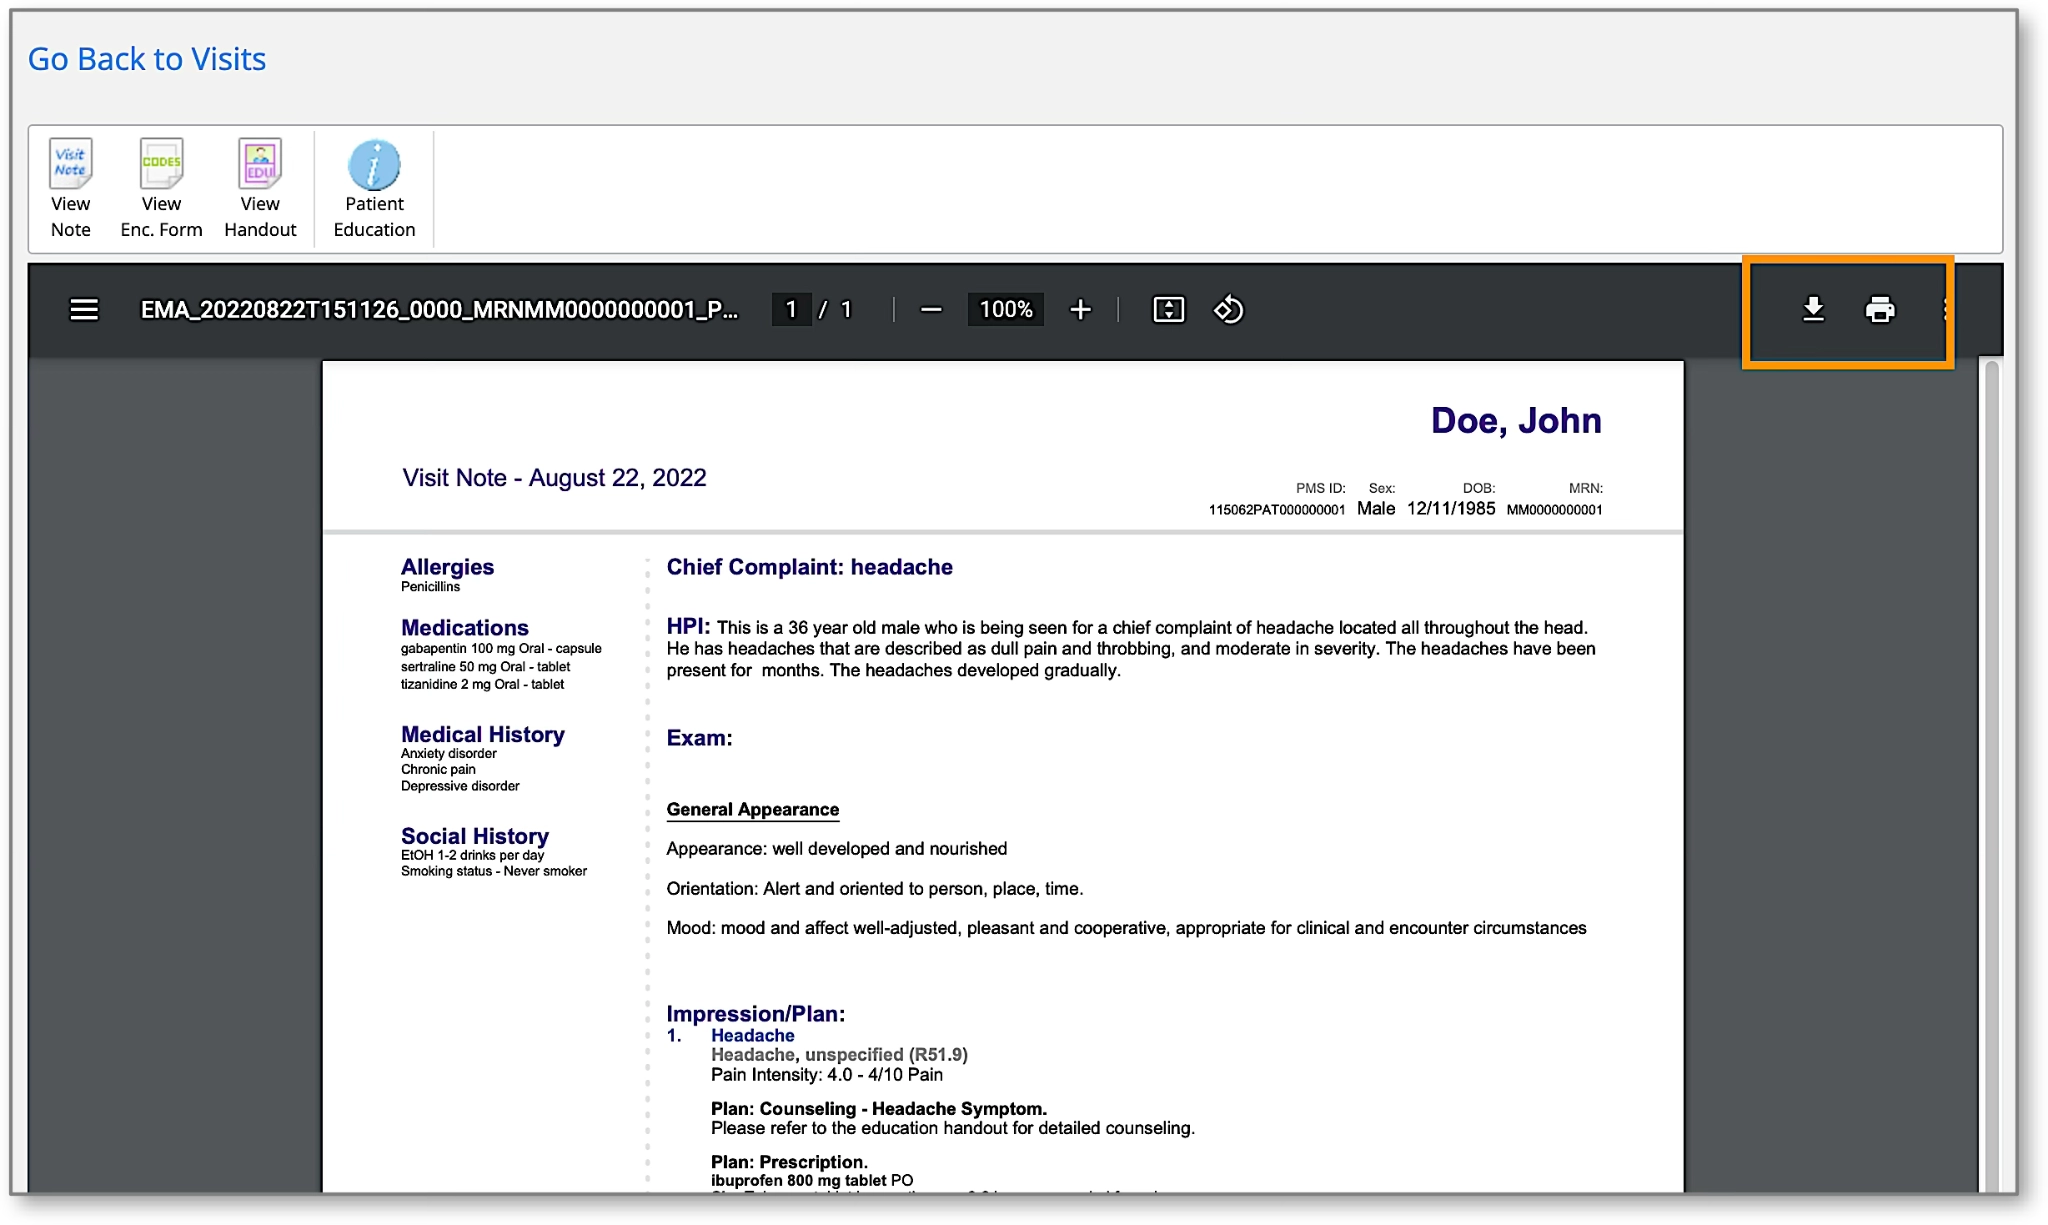
The Patient Portal allows you to access your medical records, including completed visit documentation from your doctor or other qualified healthcare provider. The following instructions will guide you through how to locate these records within the portal.
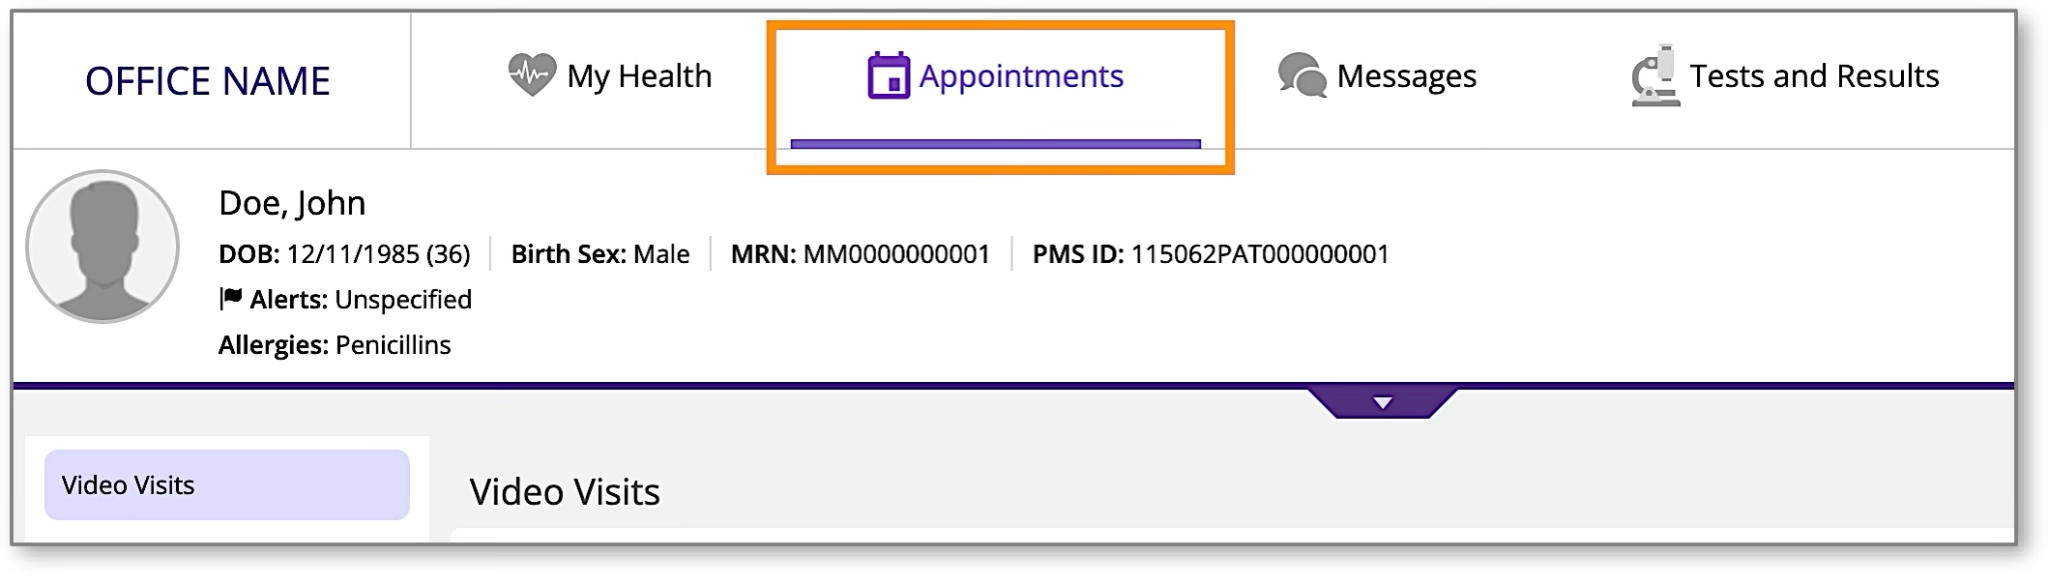
Once logged in to the portal, select Appointments from the main navigation bar.
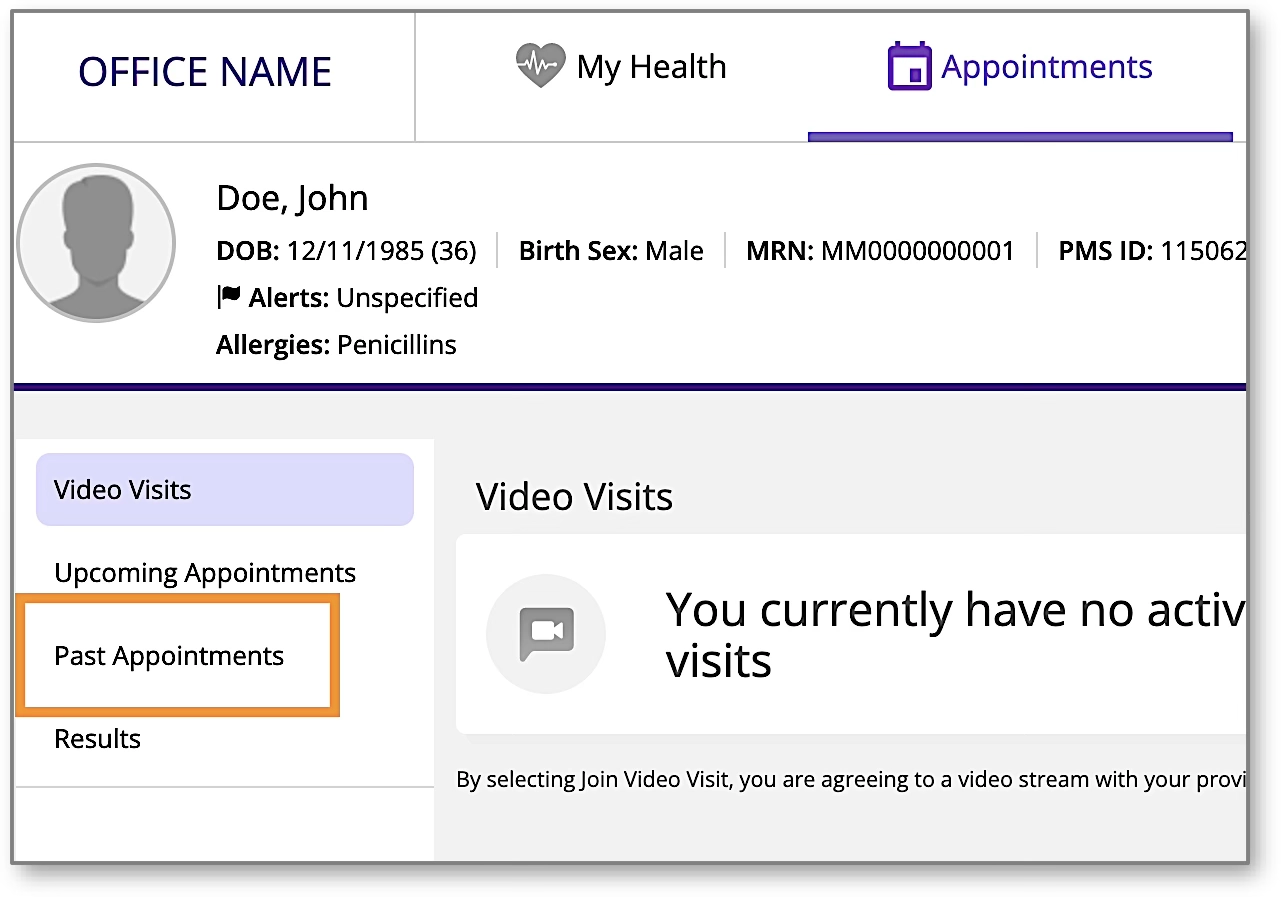
Select Past Appointments.
From the Visit Date column, select the blue hyperlink for the visit documentation you would like to view.
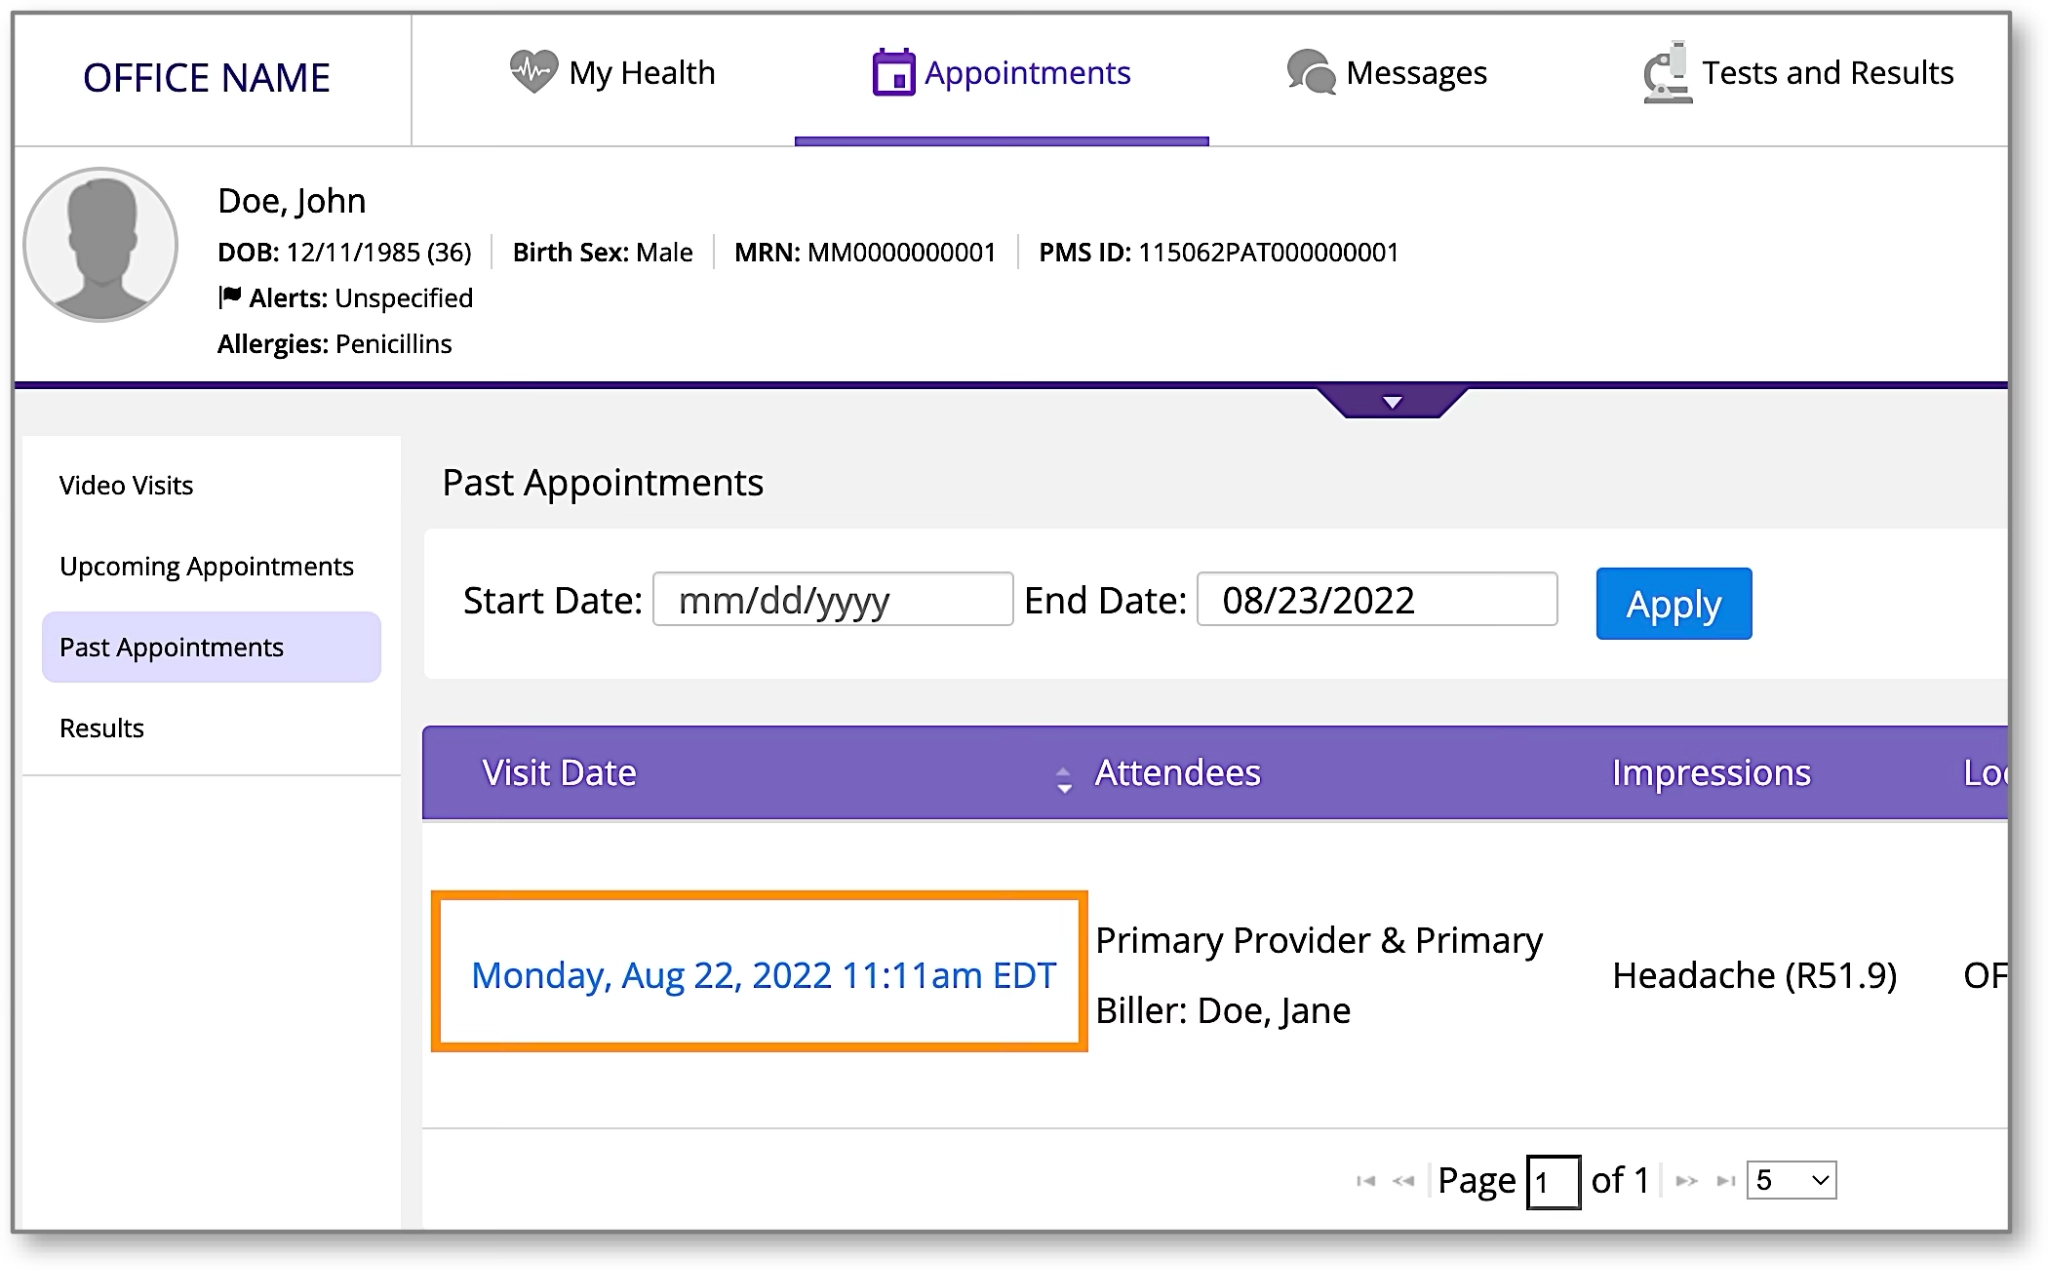
Note: If the visit link is in black font, this means the visit is not ready to be viewed. Please check back later.
Your internet browser’s PDF viewer should open the document for you to view. You should also have options to download or print the document.